
Add an Azure node#
Add an Azure resource for agentless scanning. Guardian supports multiple types of Azure nodes. For example, you can add Azure Virtual Network (VNet) nodes, Azure Virtual Machine (VM) nodes, Azure Storage nodes, and more.
Applies to: Guardian Classic
Note
Additionally, you can import Azure nodes in bulk rather than individually, as the below process describes. For more information, see Add Nodes in Bulk via Azure.
Dependencies#
To add an Azure node, the following dependencies must be met:
- Linux Connection Manager – Set up in Guardian. For more information, see Linux Connection Manager.
- Microsoft Azure Account – Account set up and Client secret key generated. For more information, see Microsoft Azure Account.
- Service Permissions – Permissions set for the service intended to be scanned. For more information, see Supported Azure Services.
Add an Azure node#
Adding an Azure node to your Guardian instance lets you monitor and track the configuration of an Azure resource.
To add an Azure node for Agentless scanning, complete the following steps:
-
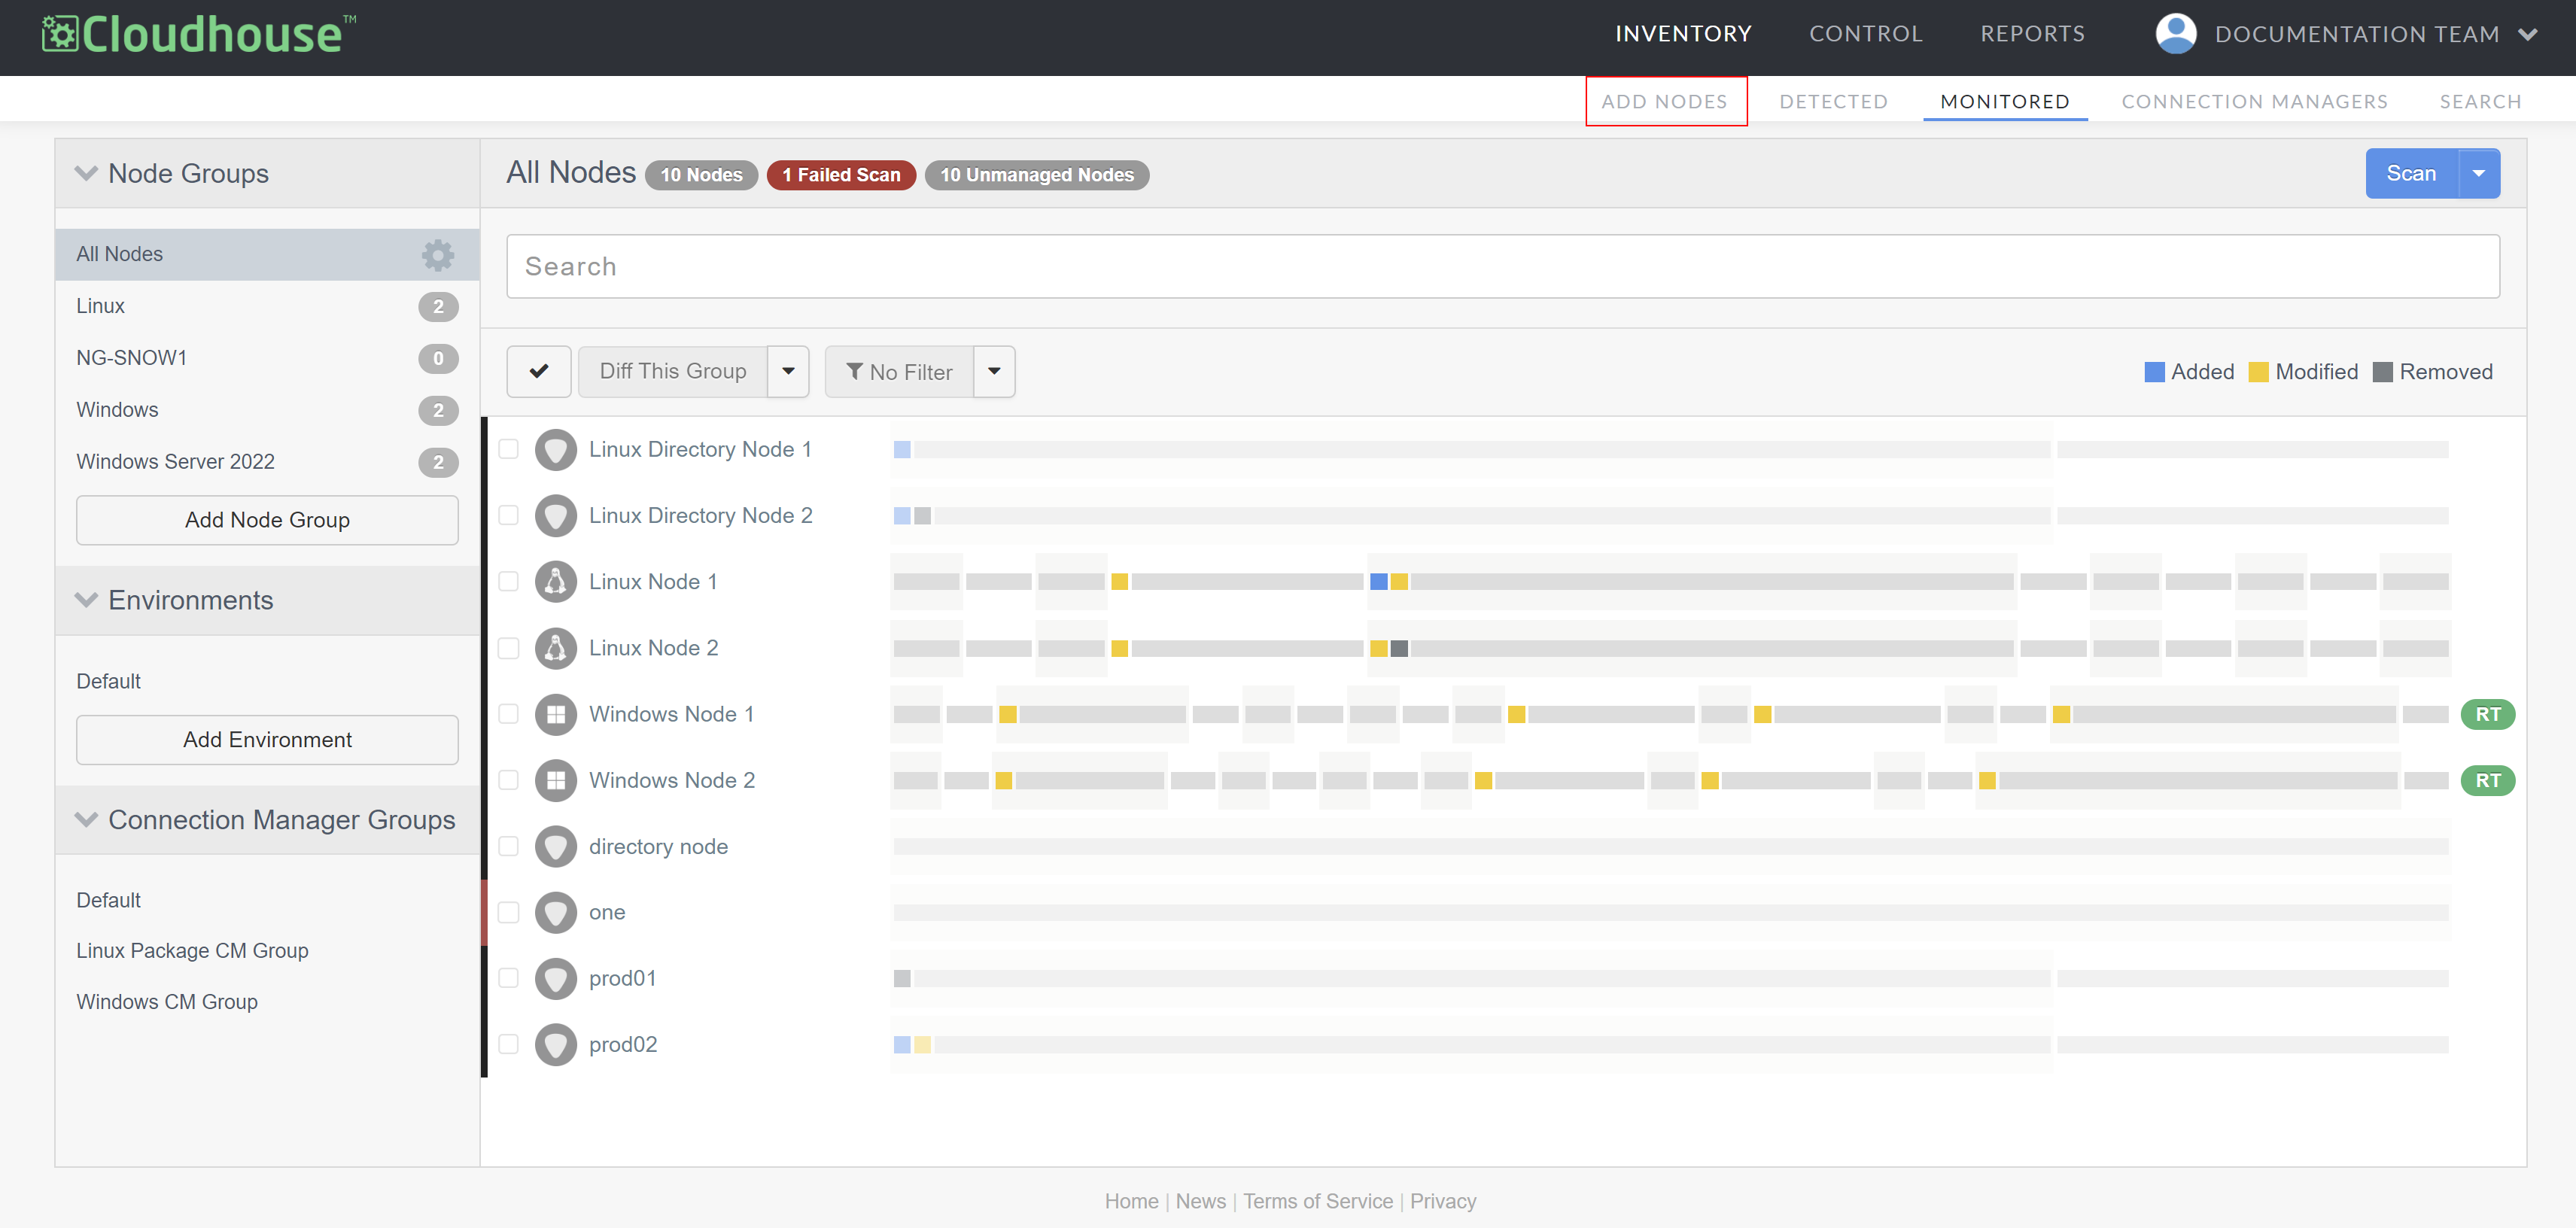
In the Guardian web application, navigate to the Add Nodes tab (Inventory > Add Nodes). The Add Nodes page is displayed.
-
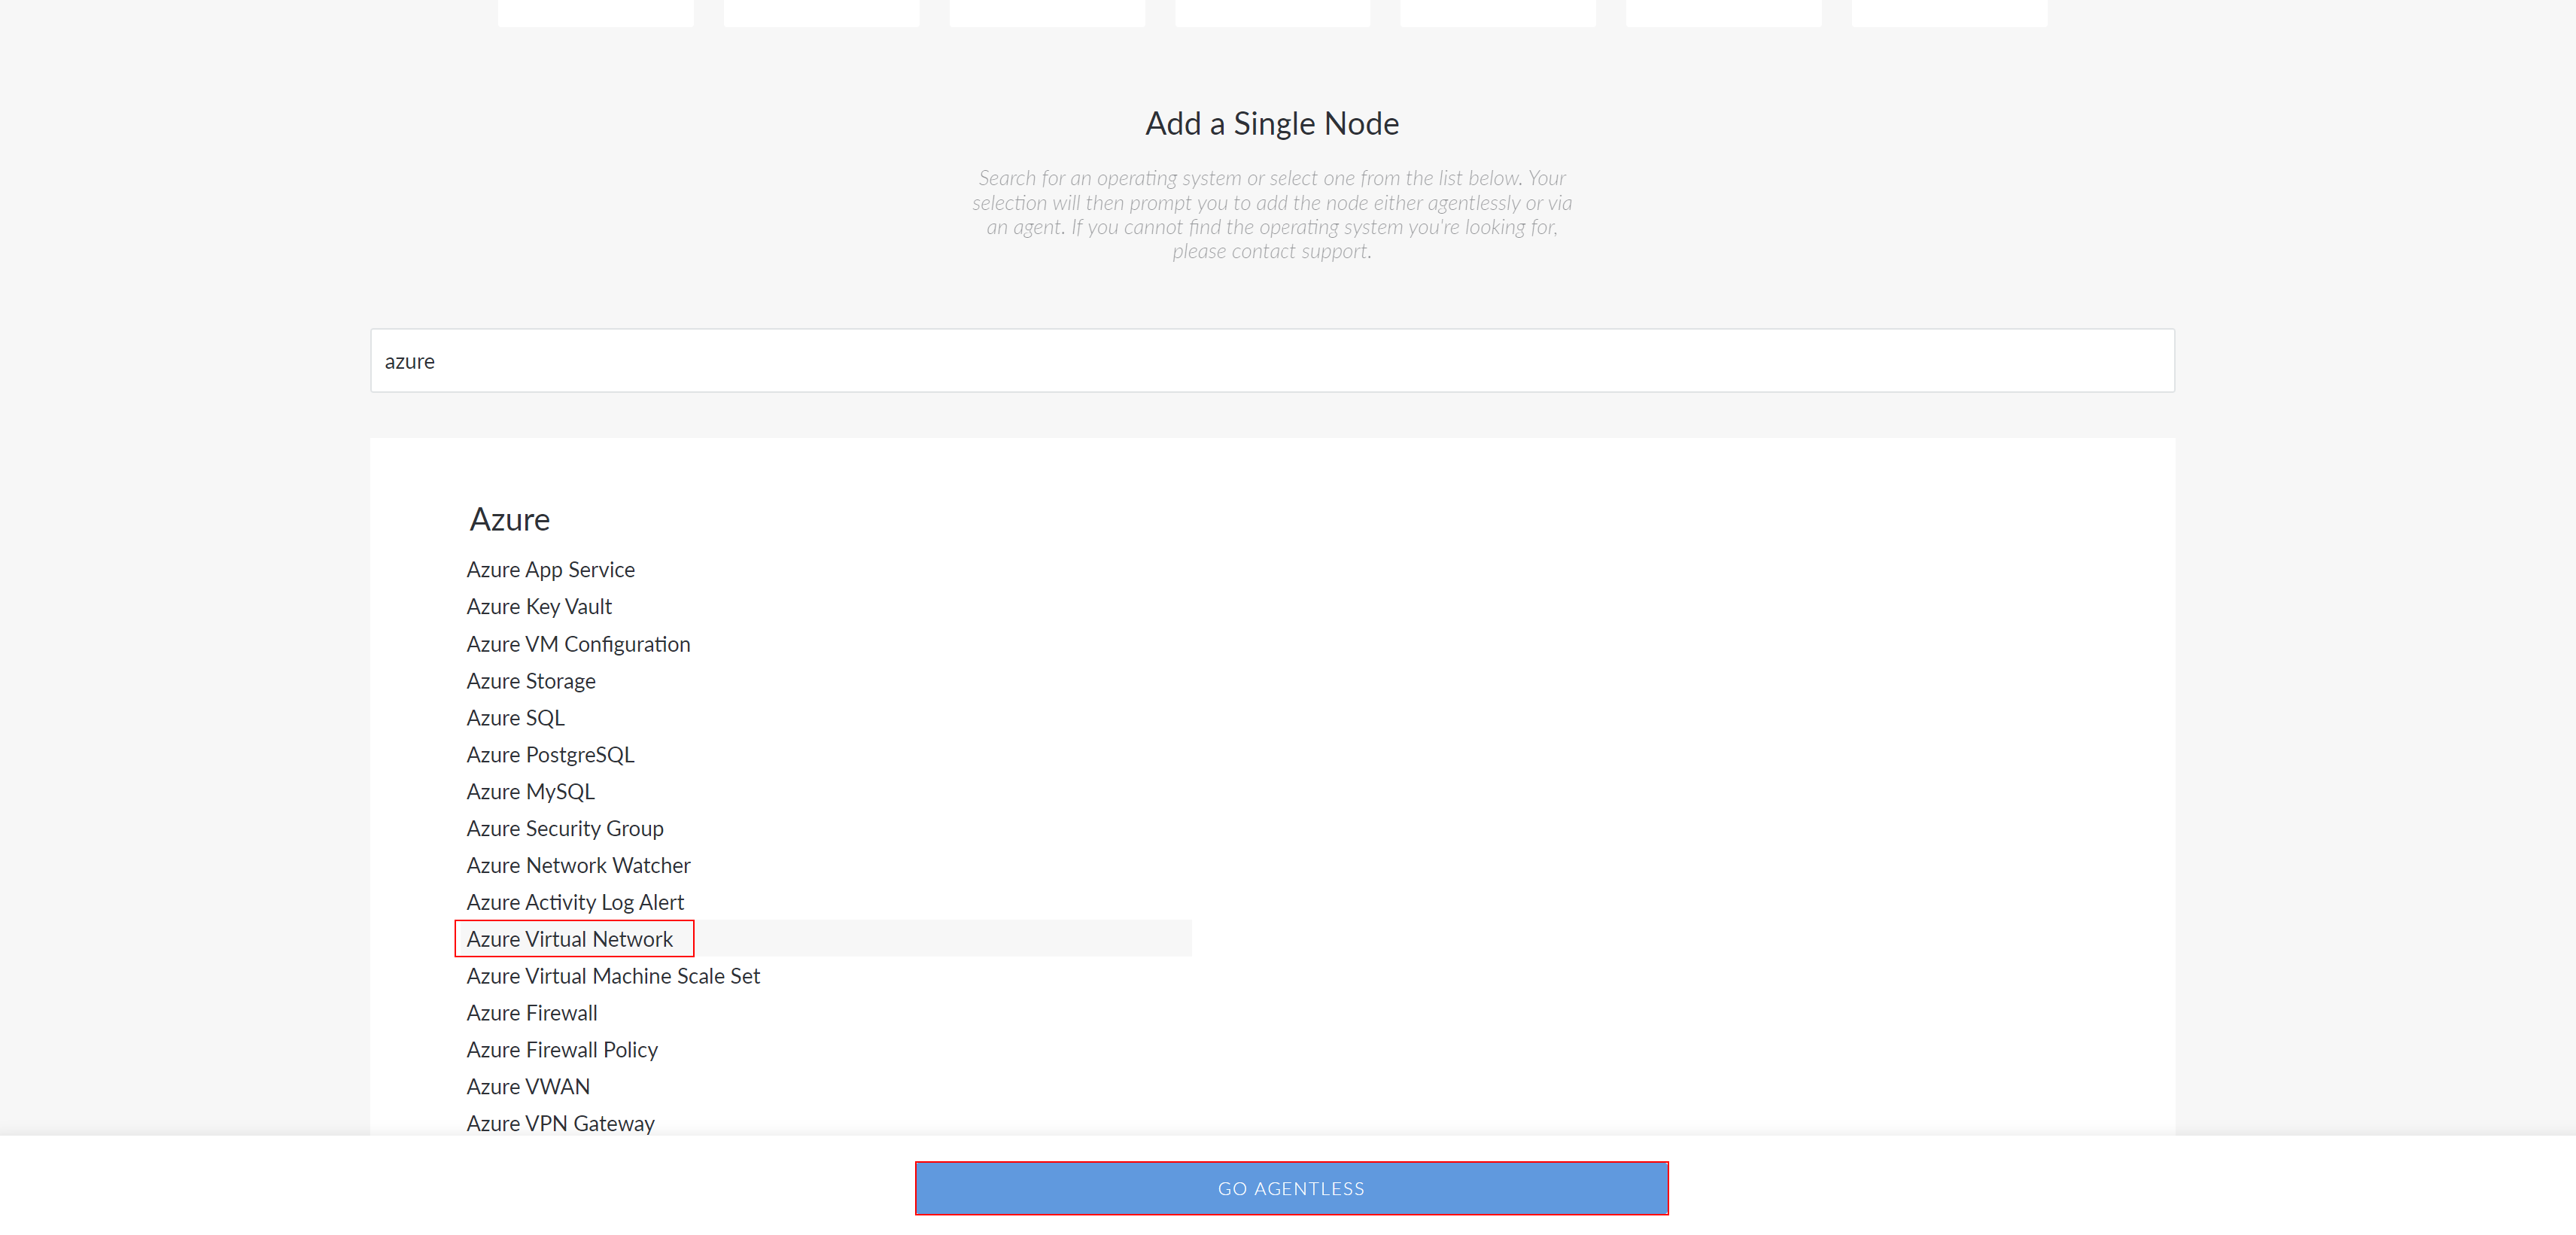
Type 'Azure' in the search bar.
-
Select the 'Azure' node type you want to add and click the Go Agentless button to proceed. The Connect Agentlessly to [Node Type] page is displayed.
-
Here, complete the following options:
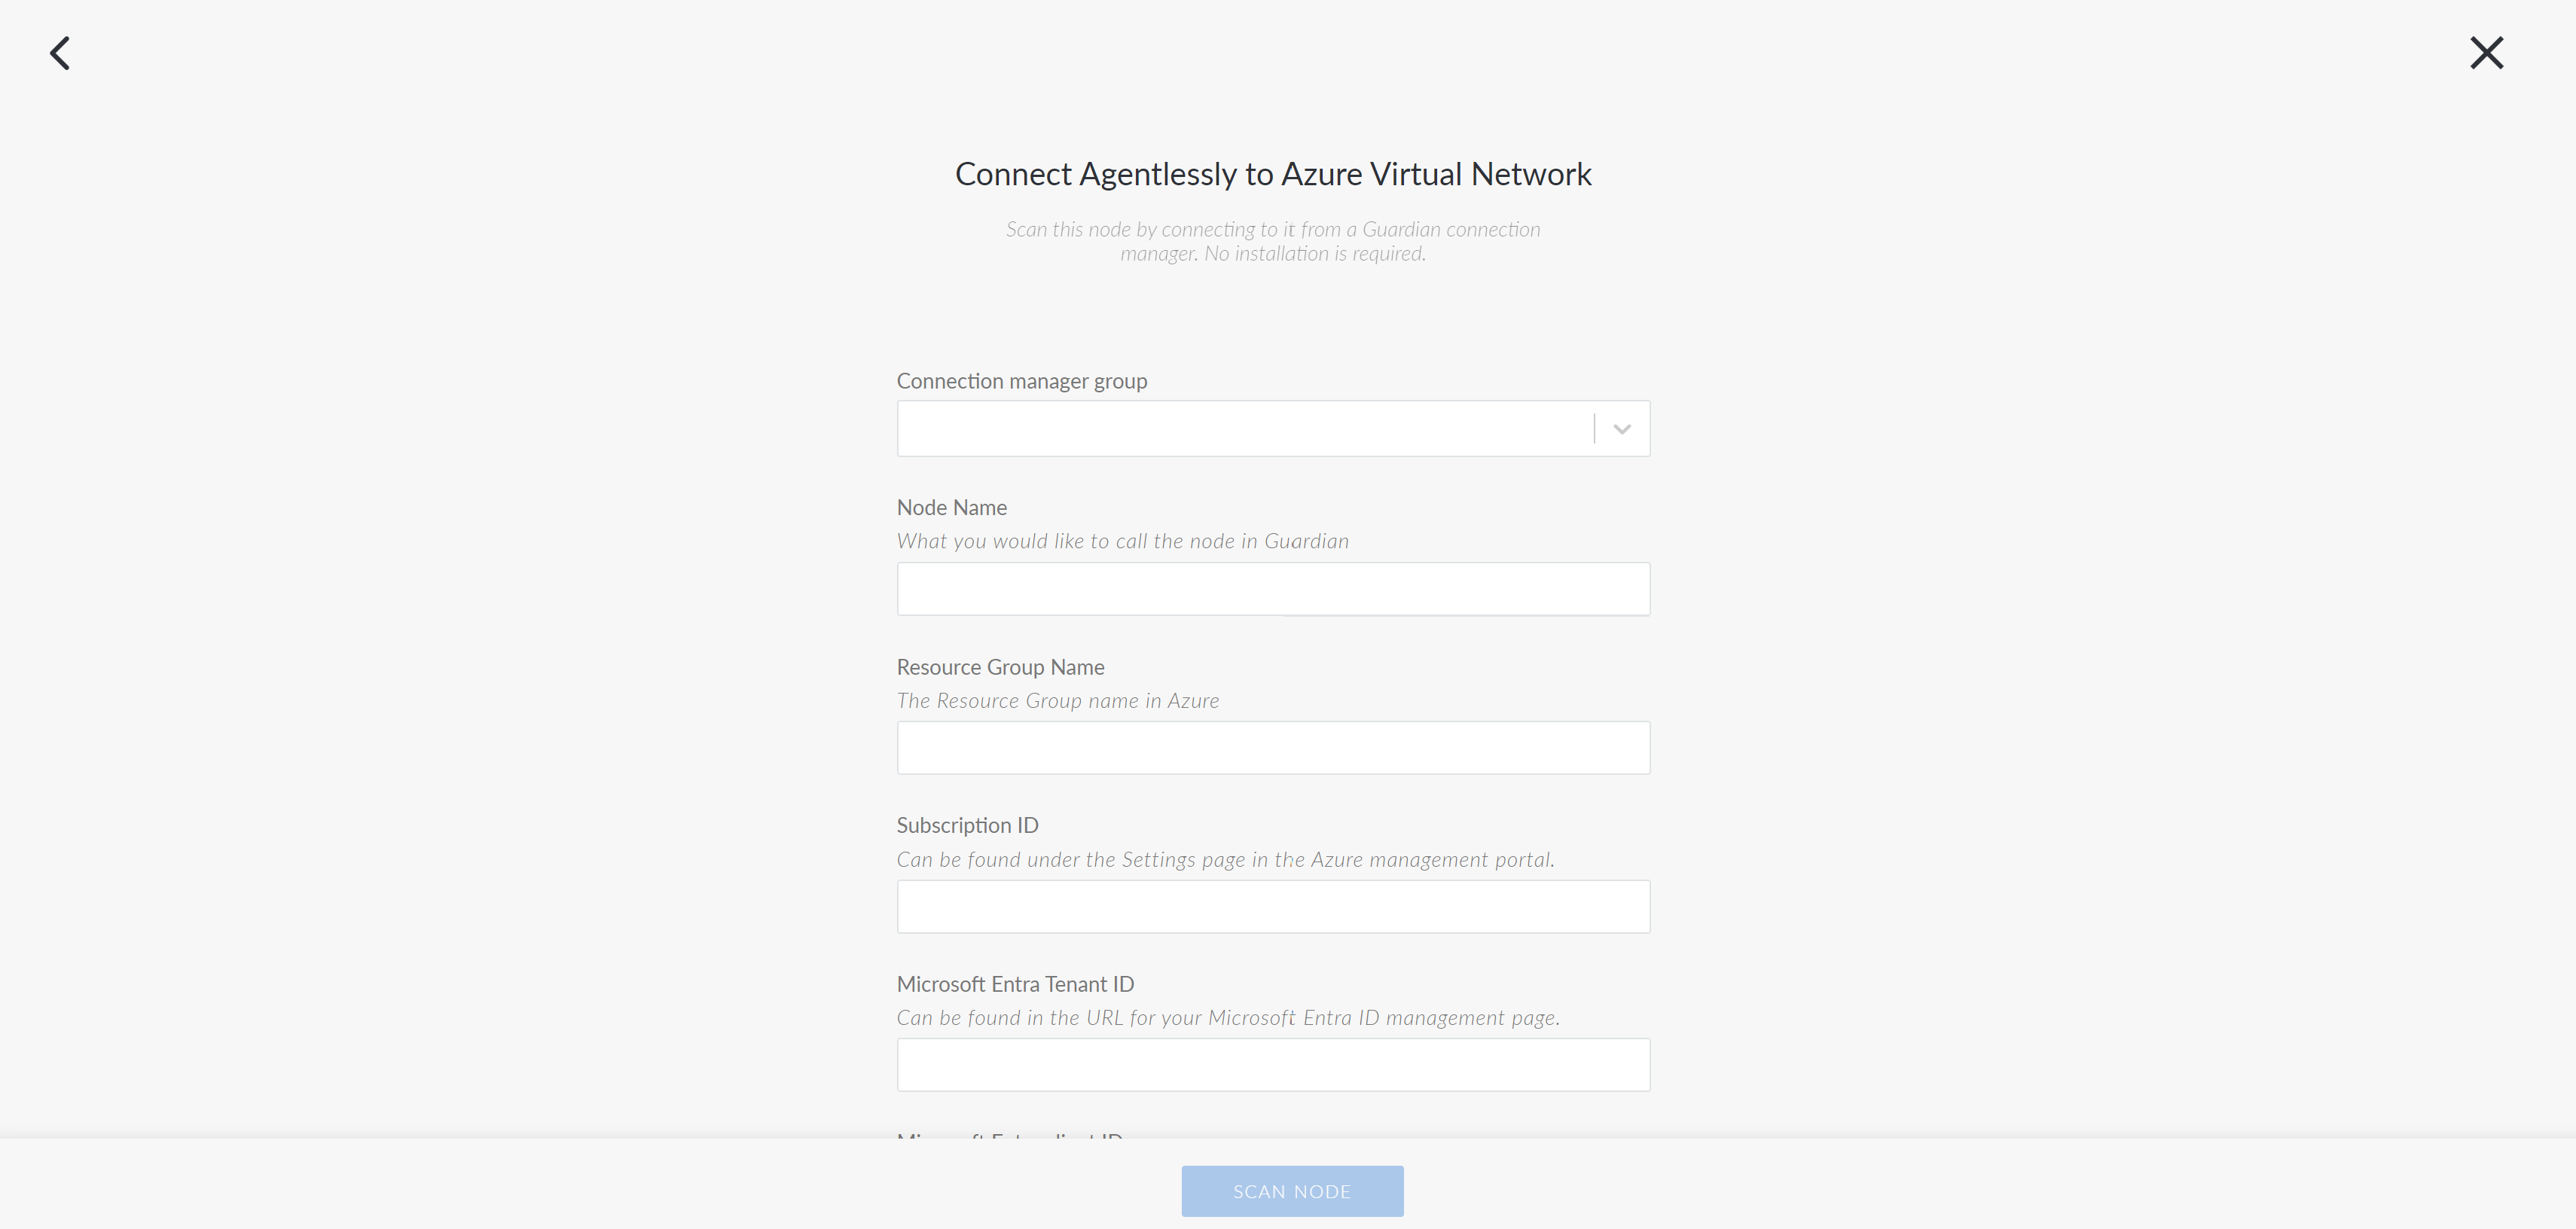
- Connection Manager group drop-down list
- The Connection Manager group that is responsible for scanning your Azure node. Select a Connection Manager group from the drop-down list.
- Node Name field
- The name of the node. The value you enter here will be used as the display name in Guardian.
- Resource Group Name field
- The name of the resource group the node belongs to in Azure.
- Subscription ID field
- The unique alphanumeric string that identifies your Azure subscription. For more information on how to source this, see Microsoft Azure Account.
- Microsoft Entra Tenant ID field
- The Globally Unique Identifier (GUID) that represents your Microsoft Entra ID (previously Azure Active Directory) instance. For more information on how to source this, see Microsoft Azure Account.
- Microsoft Entra Client ID field
- The unique identifier assigned to your application, registered within the Microsoft Entra ID (previously Azure Active Directory) instance. For more information on how to source this, see Microsoft Azure Account.
- Client Secret field
- The unique identifier that the application uses to prove its identity when requesting a token. For more information on how to source this, see Microsoft Azure Account.
- [Node Type] Name field
-
The name of the node in your Microsoft Entra ID (previously Azure Active Directory).
Note
The name of this field changes depending on the Azure node type you select. For example, for 'Azure Virtual Network' node, this field would be labeled 'Virtual Network Name'.
- Once you've completed the above options click Scan Node to add the Azure node to your Guardian instance.
Now, Guardian performs an initial scan of the node. You can wait on this page for the scan to finish, at which point you will see a View Scan button. To view the results of this initial scan, click View Scan. However, you can also navigate elsewhere while Guardian performs its initial scan of the node. You can then view the status of the scan on the Job History page (Inventory > Job History). For more information on what to do next after adding a node, see below.
Where next#
- Read Node Scan Results What every scan of a node collected.
- Organise Node groups Group nodes by type, location and more.
- Tune Scan options Choose what each scan collects.
- Compare Configuration differencing Compare nodes, groups and scans.
- Govern Policies Define the configuration you expect.
- Connect Integrations Sync nodes and act on events.