
Add a Windows node#
Add a Windows node for agentless scanning. Guardian supports multiple types of Windows nodes. For example, you can add Windows 10 nodes, Windows 11 nodes, Windows Server 9 nodes, and more.
Applies to: Guardian Classic
Note
For information on using the Windows Agent to add nodes, see Windows Agent.
Add a Windows node#
Adding a Windows node to your Guardian instance lets you monitor and track the configuration of a Windows system.
Warning
The following process assumes that you already have a Windows Connection Manager configured within your Guardian instance. For more information, see Windows Connection Manager.
To add a Windows node for Agentless scanning, complete the following steps:
-
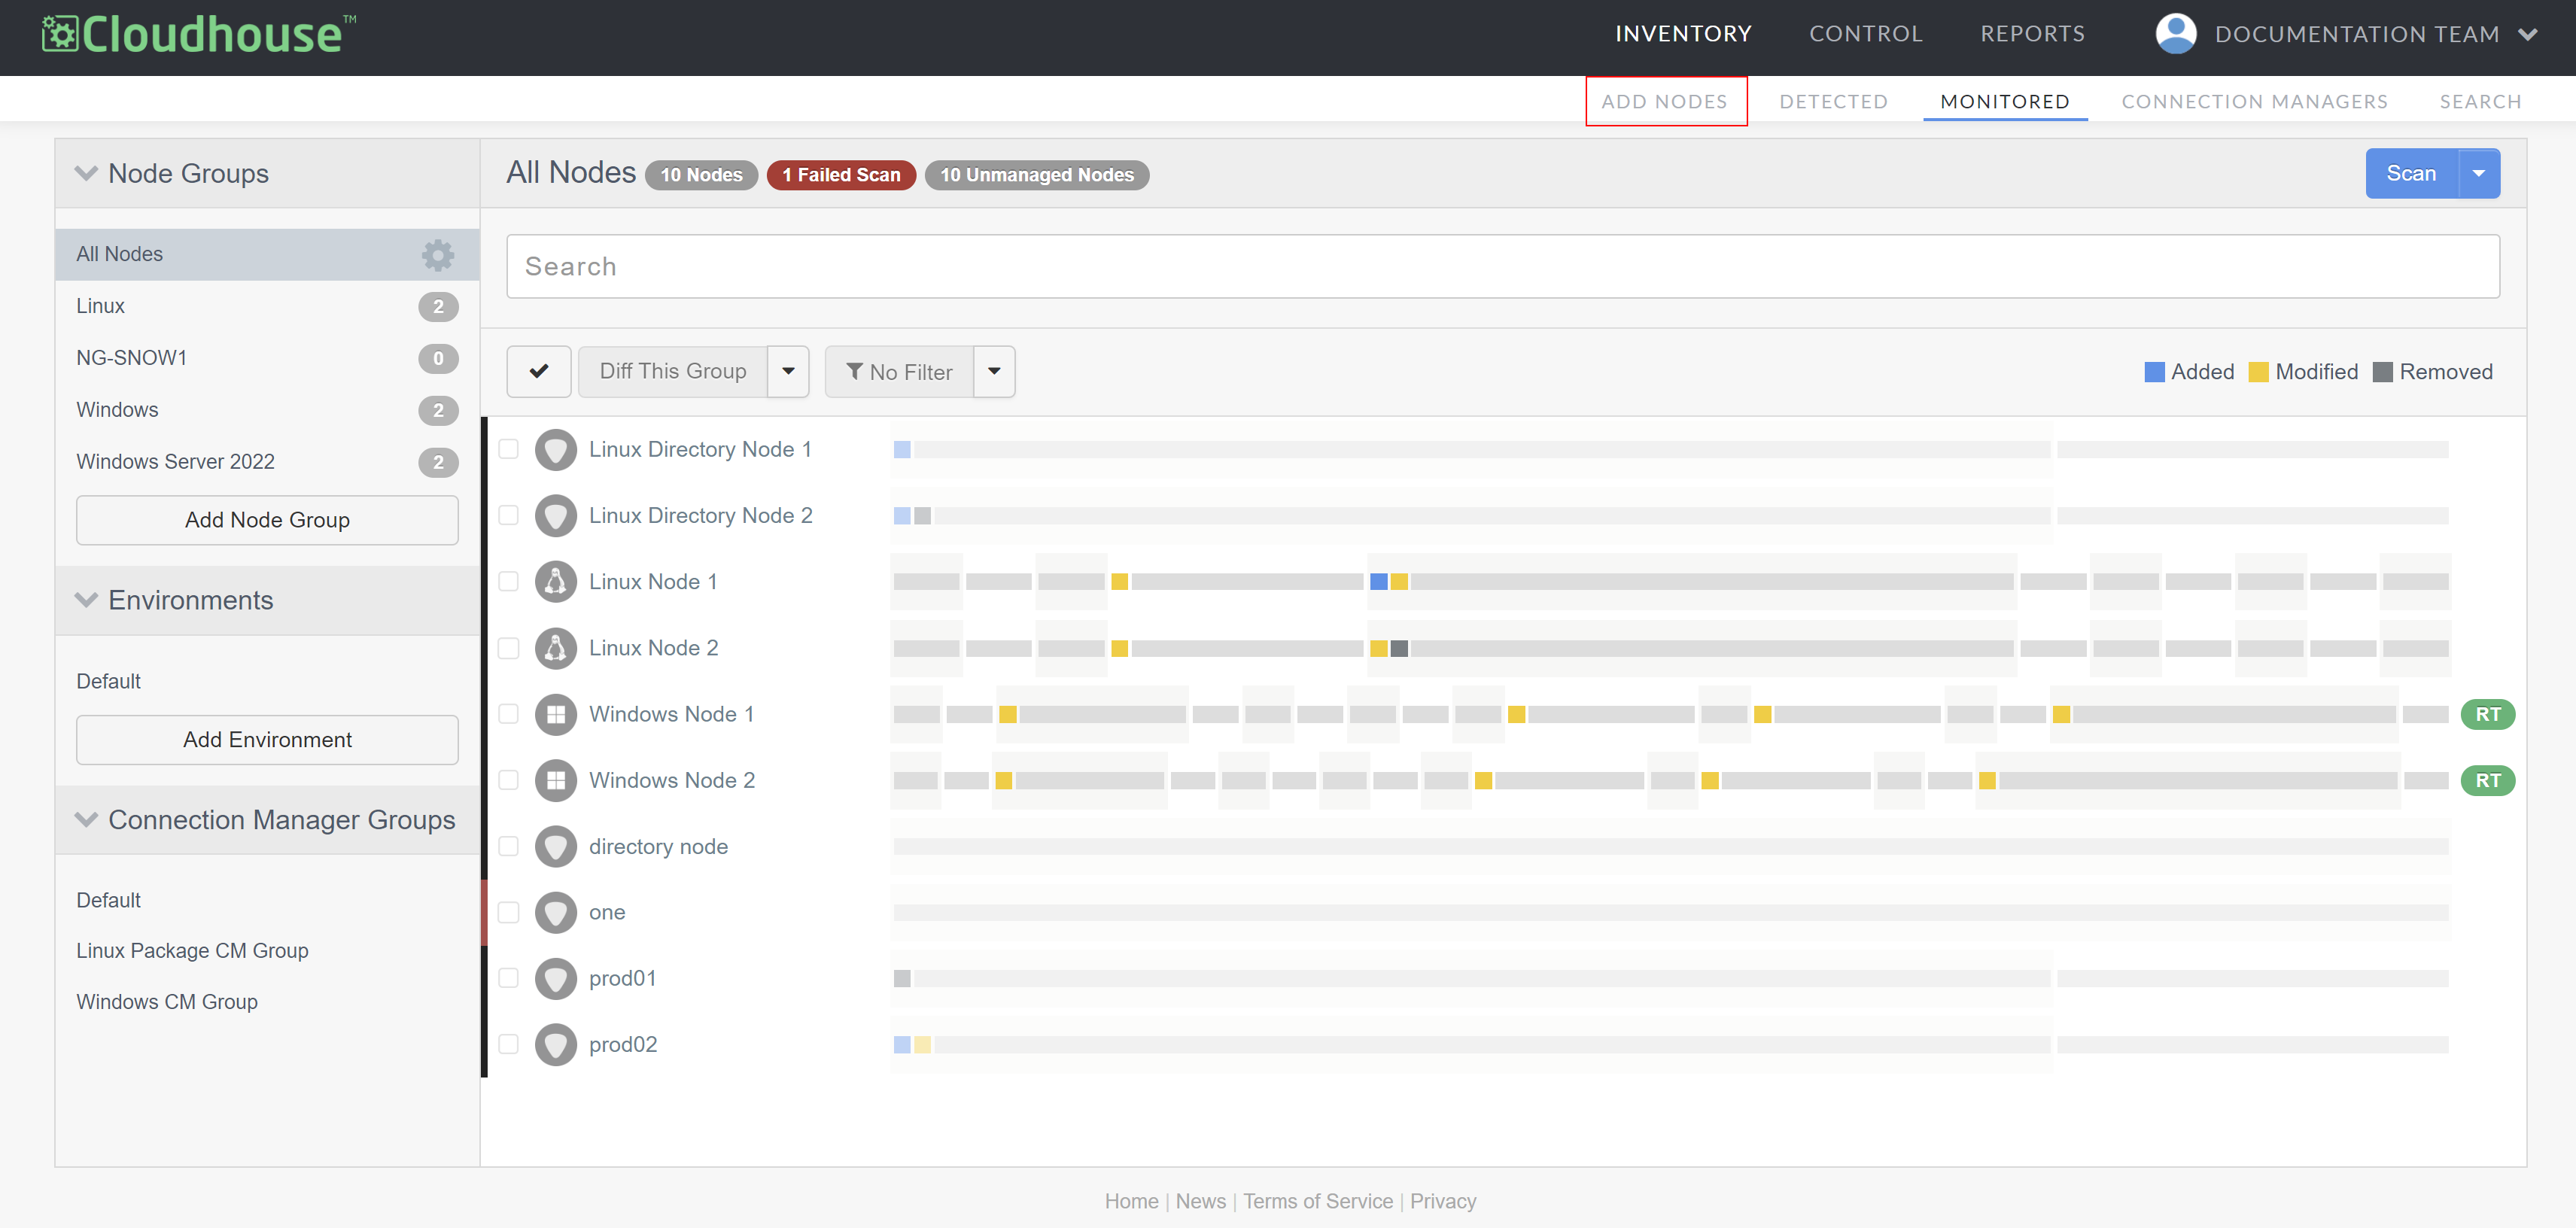
In the Guardian web application, navigate to the Add Nodes tab (Inventory > Add Nodes). The Add Nodes page is displayed.
-
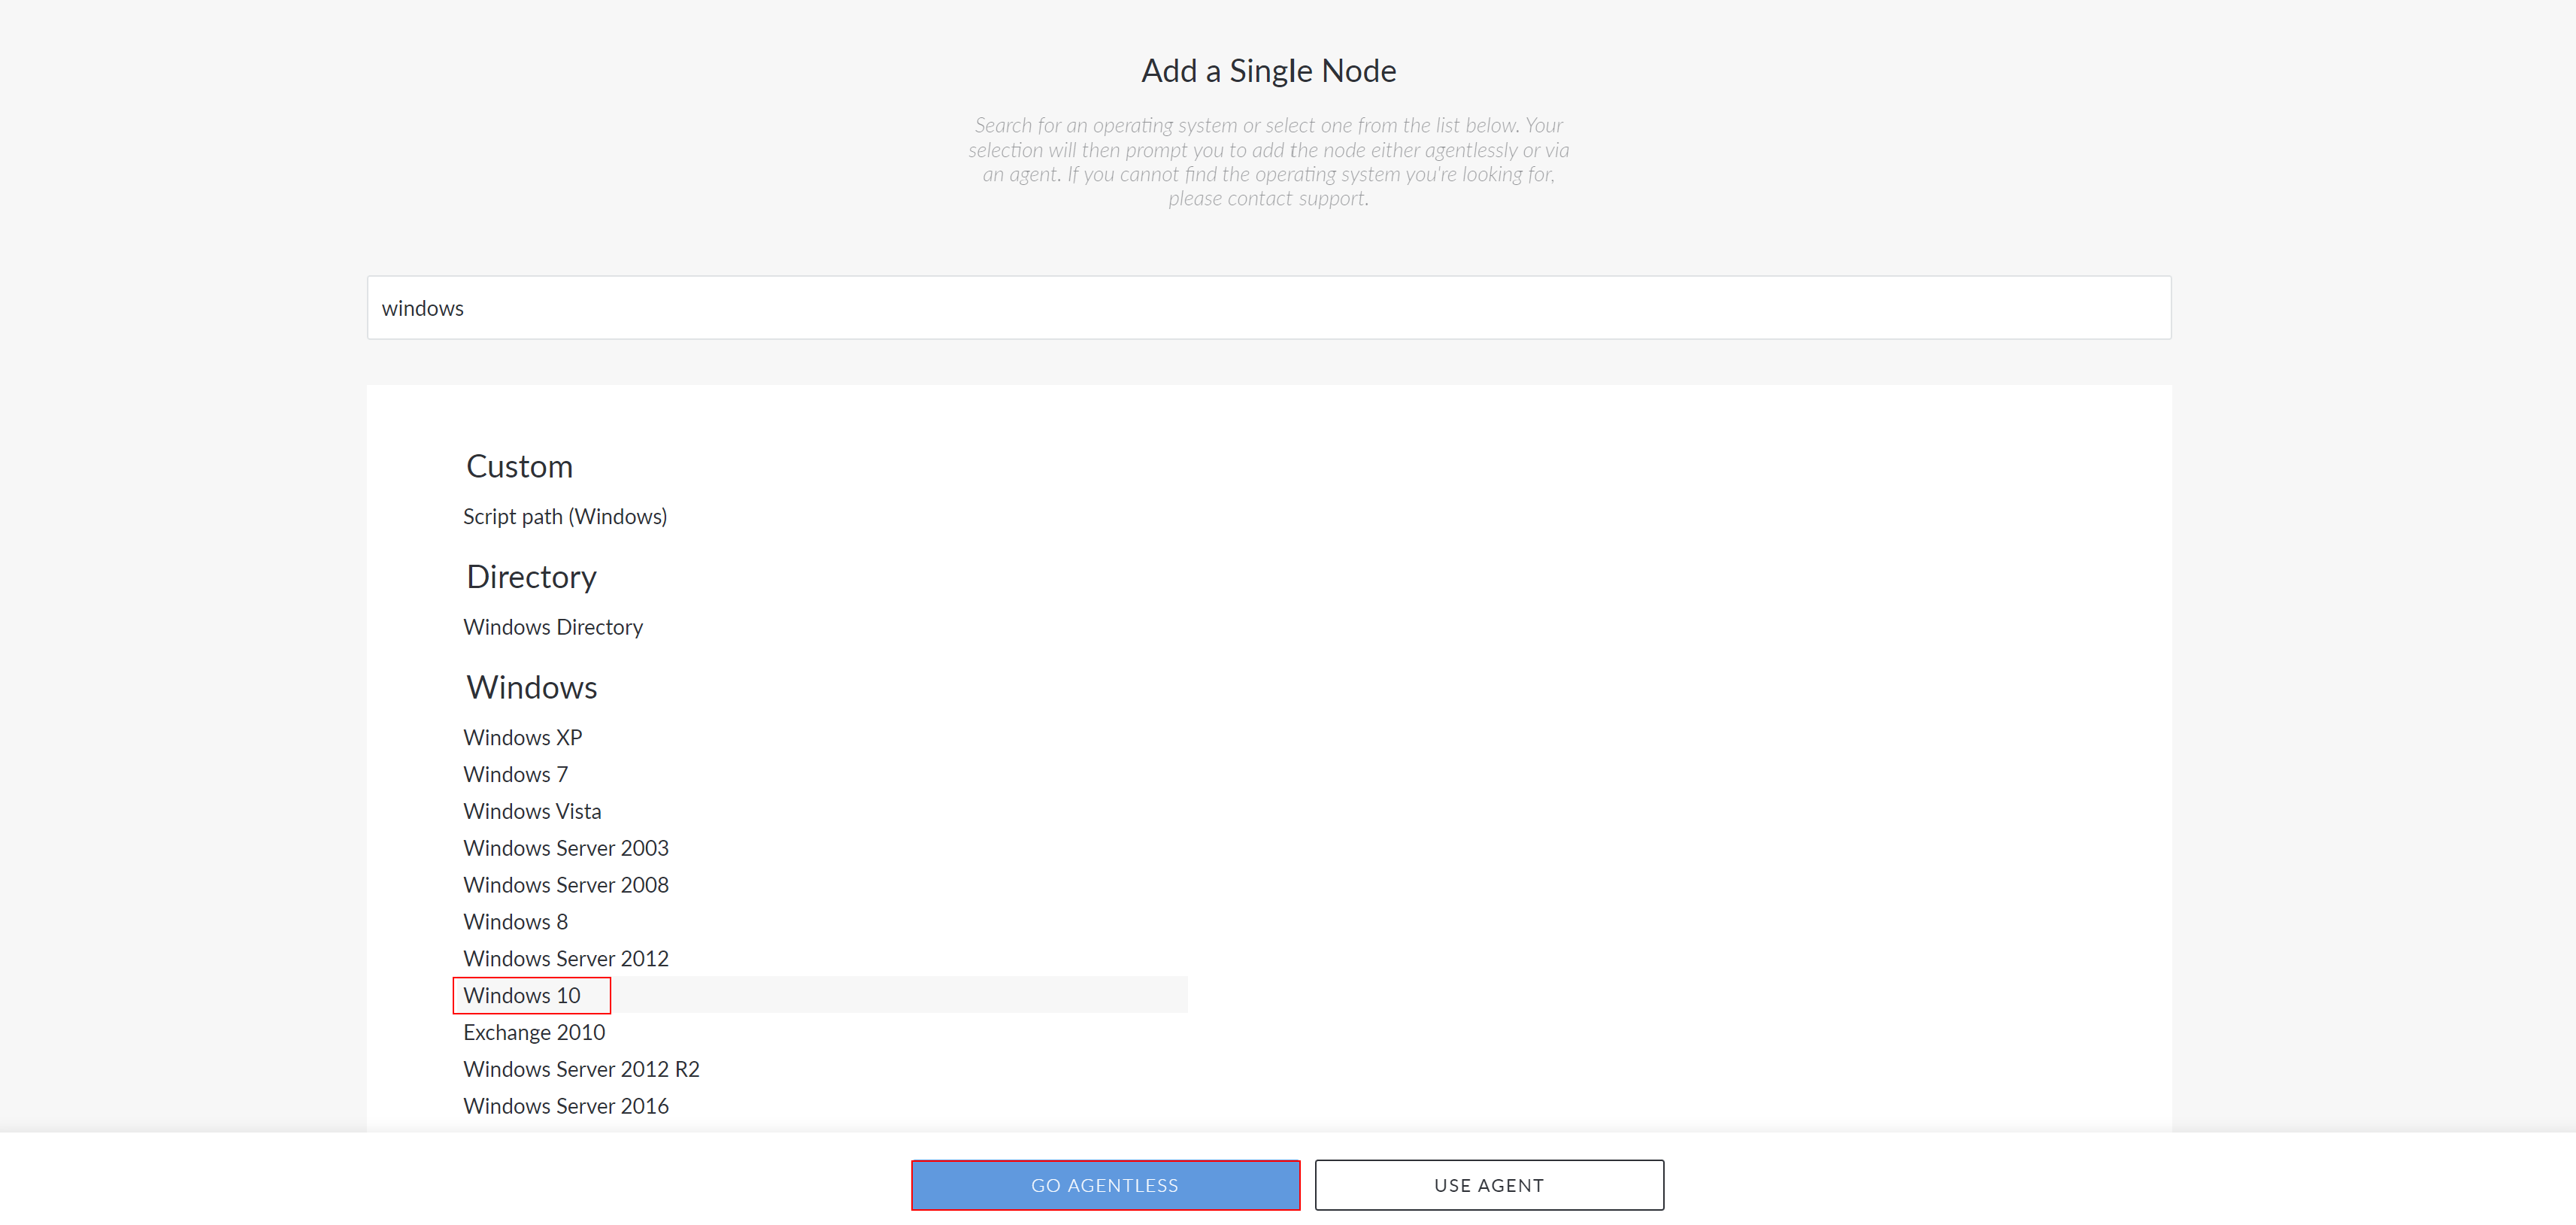
Type 'Windows' in the search bar.
-
Select the 'Windows' node type you want to add and click the Go Agentless button to proceed. The Connect Agentlessly to [Node Type] page is displayed.
-
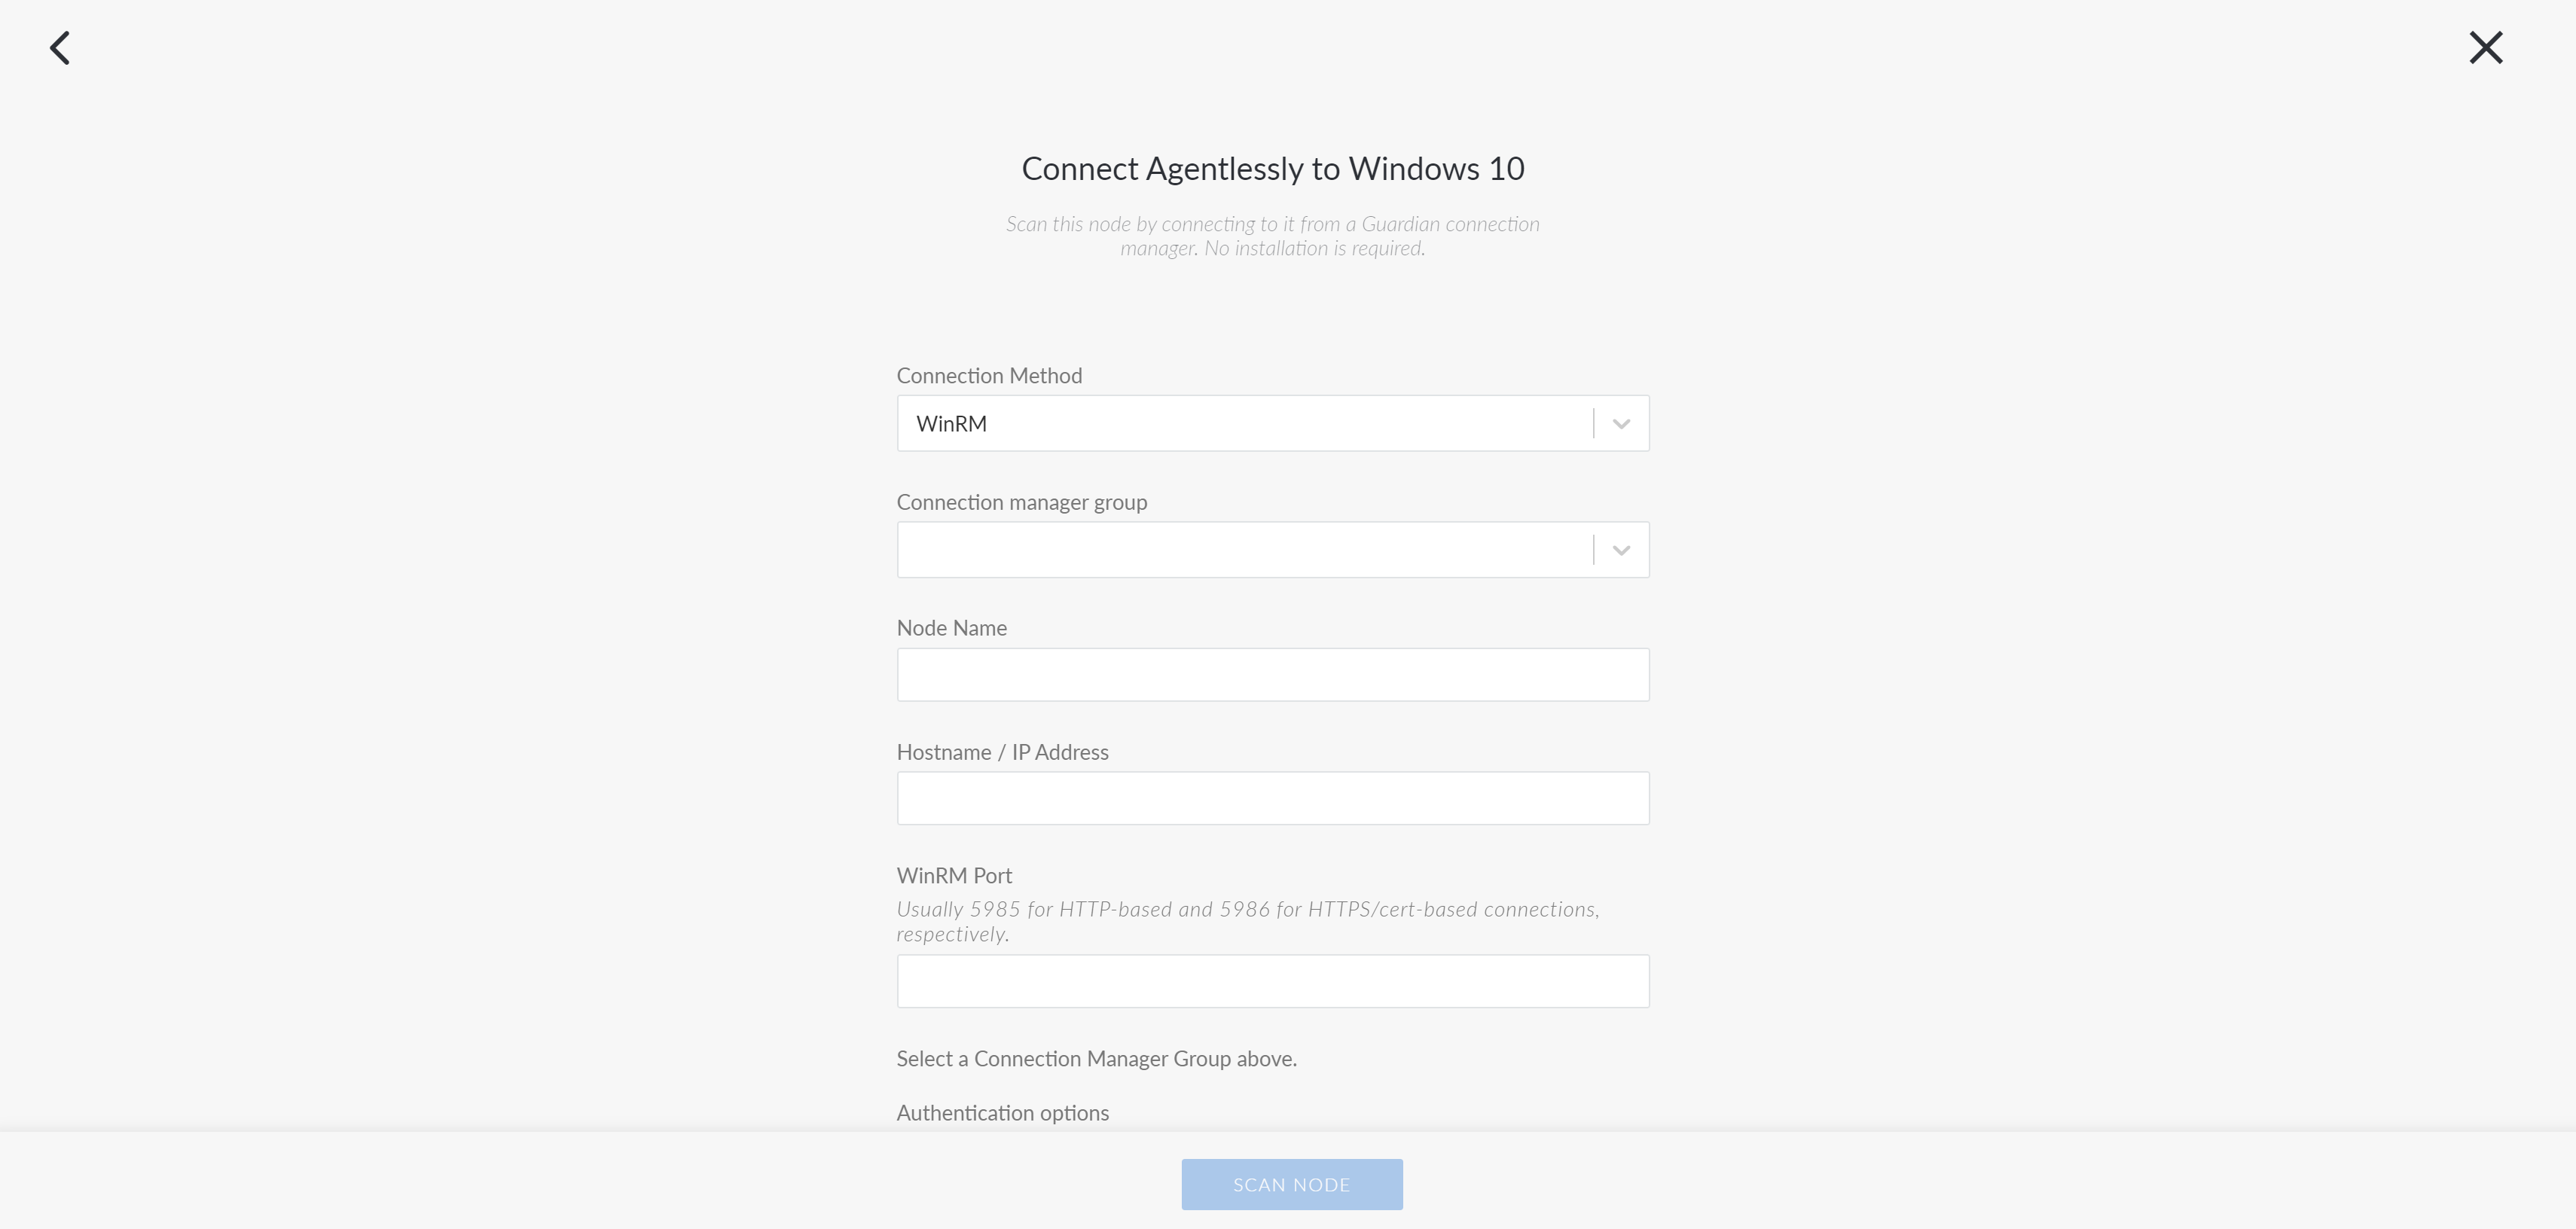
Here, complete the following options:
- Connection Manager group drop-down list
- The Connection Manager group that is responsible for scanning your Windows node. Select a Connection Manager group from the drop-down list.
- Node Name field
- The name of the node. The value you enter here will be used as the display name in Guardian.
- External ID field
- The property required to authorise Guardian's connection to the node.
- Hostname / IP Address field
-
The hostname or IP address of your node.
Note
Typically, this is the fully qualified domain name (FQDN). However, it could also be the IP address.
- WinRM Port field
- The default port for WinRM. Enter 5985 for HTTP-based connections, or 5986 for HTTPS/cert-based connections. If you are using non-standard ports for WinRM, enter them here.
- Guardian Credentials Vault radio button
-
Option to use credentials stored in the Guardian vault. Select this option to display the Credentials drop-down list, then choose the credentials you want to use. Additionally, you can select 'Add New Credential' to display the Create Credential dialog if you anticipate using these same credentials for other nodes or integrations. For more information, see Create Credential.
Note
The Credentials tab was introduced in V3.46.0 of Guardian. For more information, see July 2024 Quarterly Release.
Warning
This option is only displayed if you have the Credentials feature enabled. If you don't, the Username and Password fields are displayed instead, as described below.
- Secret Server radio button
-
Option to use credentials stored in Secret Server. Select this option to display the Secret Server Items drop-down list, then choose the credentials you want to use. The credentials displayed are defined by the Secret Server integration. For more information, see Secret Server Integration.
Note
The Secret Server feature was introduced in V3.54.0 of Guardian. For more information, see April 2025 Quarterly Release.
Warning
This option is only displayed if you have the Secret Server feature enabled. If you don't, the Username and Password fields are displayed instead, as described below.
- Azure Key Vault radio button
-
Use credentials stored in your organisation's Azure Key Vault. The credentials displayed are based on the Azure Key Vault integration. For more information, see Azure Key Vault Credentials.
Note
The Azure Key Vault feature was introduced in V3.64.0 of the Guardian Web Application. This is an optional feature that must be enabled. For more information, see March 2026 Monthly Release.
If selected, you are required to provide the following information:
- Username field – Enter the username of the Azure account required to access the Azure Key Vault. This must be the same account that the selected Azure Key Vault secret belongs to.
- Azure Key Vault Items drop-down list – Select a secret from the list. The secrets displayed are based on values from the Key Vault(s) configured in the Azure Key Vault integration.
Tip
For more information, see Azure Key Vault Integration.
Warning
This option is only displayed if you have the Azure Key Vault feature enabled. If you don't, you'll be prompted to enter a Username and Password for authentication.
- AWS Secrets Manager radio button
-
AWS Secrets Manager – Use credentials stored in your organisations AWS Secrets Manager. The credentials displayed are based on the AWS Secrets Manager integration. For more information, see AWS Secrets Manager Credentials.
Note
The AWS Secrets Manager feature was introduced in V3.64.0 of the Guardian Web Application. This is an optional feature that must be enabled. For more information, see March 2026 Monthly Release.
- AWS Secrets Manager Items drop-down list – Select credentials from the list. The credentials displayed are based on values from the credentials configured in the AWS Secrets Manager integration.
Tip
For more information, see AWS Secrets Manager Integration.
Warning
This option is only displayed if you have the AWS Secrets Manager feature enabled. If you don't, you'll be prompted to enter a Username and Password for authentication.
- Username and Password field
-
The username and password of the user account configured to use WinRM.
Note
This option is only displayed if the Credentials feature is not enabled.
- CredSSP checkbox
- Select to enable an encrypted Transport Layer Security (TLS) protocol when authenticating the username and password of the service account. If selected, the authentication process is encrypted during transmission ensuring that login credentials are protected from being intercepted or compromised by unauthorised parties.
- Once you've completed the above options click Scan Node to add the Windows node to your Guardian instance.
Now, Guardian performs an initial scan of the node. You can wait on this page for the scan to finish, at which point you will see a View Scan button. To view the results of this initial scan, click View Scan. However, you can also navigate elsewhere while Guardian performs its initial scan of the node. You can then view the status of the scan on the Job History page (Inventory > Job History). For more information on what to do next after adding a node, see below.
Where next#
- Read Node Scan Results What every scan of a node collected.
- Organise Node groups Group nodes by type, location and more.
- Tune Scan options Choose what each scan collects.
- Compare Configuration differencing Compare nodes, groups and scans.
- Govern Policies Define the configuration you expect.
- Connect Integrations Sync nodes and act on events.